To make jams and spreads, most recipes involve just a few ingredients and a couple of steps. The keyword is "Patience" as you will be standing at the stove for some time and stirring continuously to reach the desired consistency. It is all worth the effort, you can rest assured. :)
Pumpkin Condensed Milk Spread
Adapted from: 四季鲜果手工果酱 by 渡部和泉
Ingredients (Makes 250 ml)
250 g pumpkin, peeled and cubed
65 g condensed milk
100 ml milk
15 g butter, softened
Method
1. Steam the pumpkin till soft. Mash and sieve through a strainer or blend using a blender.
2. Combine all the ingredients into a pot and mix well. Cook with low heat and stir continuously.
3. Once the mixture is bubbling and boiling, remove from heat and fill up the bottle while hot.
Notes
- This can keep for 4 – 5 days.
Friday, November 8, 2013
Thursday, October 31, 2013
Walnut Buns
This time round, I make walnut buns using the same recipe as my earlier buns. :)
Walnut Buns
Adapted from: Hidehide
Ingredients (Makes 8)
200 g bread flour
4 g instant yeast
20 g sugar
3 g (½ tsp) salt
100 g warm water
20 g egg
20 g unsalted butter
50 g walnuts
Method
1. Toast the walnuts at 180°C for 10 minutes. Coarsely chop the walnuts and cool completely.
2. Sprinkle the yeast over the warm water. Stir to dissolve the yeast. Leave for 15 minutes.
3. Combine all ingredients except butter and walnuts in a bowl and knead till a non-sticky dough is formed.
4. Add in butter and continue to knead till the dough is smooth, elastic and non-sticky. Do the window pane test.
5. Add in walnuts and knead for a few minutes, or until the walnuts are incorporated.
6. Place the dough in a lightly greased mixing bowl, cover with cling wrap and let it proof for about 50 – 60 minutes, or until double in volume.
7. Remove the dough from the bowl and give a few light kneading to punch out the gas in the dough. Turn out the dough and fold the dough into thirds.
8. Divide the dough into 8 equal portions and shape into rounds. Cover with a damp cloth or cling wrap and let them rest for 10 minutes.
9. Shape into rounds. Flatten the dough lightly and make 5 incisions 2-cm with a bread scraper.
10. Place the dough on a lined baking tray, cover with cling wrap and let them proof for about 40 – 50 minutes, or until double in volume.
11. Brush the top with egg wash.
12. Bake in a preheated oven at 200°C for 10 minutes, or until golden brown.
Walnut Buns
Adapted from: Hidehide
Ingredients (Makes 8)
200 g bread flour
4 g instant yeast
20 g sugar
3 g (½ tsp) salt
100 g warm water
20 g egg
20 g unsalted butter
50 g walnuts
Method
1. Toast the walnuts at 180°C for 10 minutes. Coarsely chop the walnuts and cool completely.
2. Sprinkle the yeast over the warm water. Stir to dissolve the yeast. Leave for 15 minutes.
3. Combine all ingredients except butter and walnuts in a bowl and knead till a non-sticky dough is formed.
4. Add in butter and continue to knead till the dough is smooth, elastic and non-sticky. Do the window pane test.
5. Add in walnuts and knead for a few minutes, or until the walnuts are incorporated.
6. Place the dough in a lightly greased mixing bowl, cover with cling wrap and let it proof for about 50 – 60 minutes, or until double in volume.
7. Remove the dough from the bowl and give a few light kneading to punch out the gas in the dough. Turn out the dough and fold the dough into thirds.
8. Divide the dough into 8 equal portions and shape into rounds. Cover with a damp cloth or cling wrap and let them rest for 10 minutes.
9. Shape into rounds. Flatten the dough lightly and make 5 incisions 2-cm with a bread scraper.
10. Place the dough on a lined baking tray, cover with cling wrap and let them proof for about 40 – 50 minutes, or until double in volume.
11. Brush the top with egg wash.
12. Bake in a preheated oven at 200°C for 10 minutes, or until golden brown.
Labels:
Breads and Loaves
Tuesday, October 29, 2013
Earl Grey Tea Cookie Buns
A treat for all the Earl Grey tea lovers! The softness of these buns are complemented with a lovely crispy cookie top. Best eaten when warm. :)
Earl Grey Tea Cookie Buns
Adapted from: Hidehide
Ingredients (Makes 8)
Milk Tea
110 g milk
2 tsp Earl Grey tea leaves
Bread Dough
200 g bread flour
4 g instant yeast
20 g sugar
3 g (½ tsp) salt
20 g egg
110 g milk tea
20 g unsalted butter
1 tsp Earl Grey tea leaves
Cookie Dough
50 g butter
50 g sugar
50 g egg
50 g cake flour, sifted
1 tsp Earl Grey tea leaves
Method
Milk Tea:
1. Grind the tea leaves. Boil the milk with the tea leaves over low heat for 5 minutes.
2. Strain the milk tea. Add milk and make 110 g milk tea and cool completely.
Bread Dough:
3. Combine all ingredients except butter in a bowl and knead till a non-sticky dough is formed.
4. Add in butter and continue to knead till the dough is smooth, elastic and non-sticky. Do the window pane test.
5. Place the dough in a lightly greased mixing bowl, cover with cling wrap and let it proof for about 50 – 60 minutes, or until double in volume.
Cookie Dough:
6. Grind the tea leaves. Combine the tea leaves and cake flour together.
7. Beat butter and sugar together until fluffy.
8. Add in egg in 4 – 5 additions and beat till incorporated.
9. Add in flour mixture and fold until incorporated.
10. Place the cookie dough batter in a piping bag and chill before use.
Assembling:
11. Remove the dough from the bowl and give a few light kneading to punch out the gas in the dough. Turn out the dough and fold the dough into thirds.
12. Divide the dough into 8 equal portions and shape into rounds. Cover with a damp cloth or cling wrap and let them rest for 10 minutes.
13. Shape into rounds again.
14. Place the dough on a lined baking tray, cover with cling wrap and let them proof for about 40 – 50 minutes, or until double in volume.
15. Pipe the cookie dough batter on top of the dough in spiral.
16. Bake in a preheated oven at 200°C for 10 minutes, or until golden brown.
Earl Grey Tea Cookie Buns
Adapted from: Hidehide
Ingredients (Makes 8)
Milk Tea
110 g milk
2 tsp Earl Grey tea leaves
Bread Dough
200 g bread flour
4 g instant yeast
20 g sugar
3 g (½ tsp) salt
20 g egg
110 g milk tea
20 g unsalted butter
1 tsp Earl Grey tea leaves
Cookie Dough
50 g butter
50 g sugar
50 g egg
50 g cake flour, sifted
1 tsp Earl Grey tea leaves
Method
Milk Tea:
1. Grind the tea leaves. Boil the milk with the tea leaves over low heat for 5 minutes.
2. Strain the milk tea. Add milk and make 110 g milk tea and cool completely.
Bread Dough:
3. Combine all ingredients except butter in a bowl and knead till a non-sticky dough is formed.
4. Add in butter and continue to knead till the dough is smooth, elastic and non-sticky. Do the window pane test.
5. Place the dough in a lightly greased mixing bowl, cover with cling wrap and let it proof for about 50 – 60 minutes, or until double in volume.
Cookie Dough:
6. Grind the tea leaves. Combine the tea leaves and cake flour together.
7. Beat butter and sugar together until fluffy.
8. Add in egg in 4 – 5 additions and beat till incorporated.
9. Add in flour mixture and fold until incorporated.
10. Place the cookie dough batter in a piping bag and chill before use.
Assembling:
11. Remove the dough from the bowl and give a few light kneading to punch out the gas in the dough. Turn out the dough and fold the dough into thirds.
12. Divide the dough into 8 equal portions and shape into rounds. Cover with a damp cloth or cling wrap and let them rest for 10 minutes.
13. Shape into rounds again.
14. Place the dough on a lined baking tray, cover with cling wrap and let them proof for about 40 – 50 minutes, or until double in volume.
15. Pipe the cookie dough batter on top of the dough in spiral.
16. Bake in a preheated oven at 200°C for 10 minutes, or until golden brown.
Labels:
Breads and Loaves
Saturday, October 26, 2013
Matcha Red Bean Buns
A cute shaped matcha bun filled with red beans. Yum...
Matcha Red Bean Buns
Ingredients (Makes 8)
200 g bread flour
4 g instant yeast
20 g sugar
3 g (½ tsp) salt
20 g egg
100 g warm water
20 g unsalted butter
2 g (1 tsp) matcha powder
1 can of sweetened red beans
Some beaten egg, for egg wash
Method
1. Sprinkle the yeast over the warm water. Stir to dissolve the yeast. Leave for 15 minutes.
2. Combine all ingredients except butter in a bowl and knead till a non-sticky dough is formed.
3. Add in butter and continue to knead till the dough is smooth, elastic and non-sticky. Do the window pane test.
4. Place the dough in a lightly greased mixing bowl, cover with cling wrap and let it proof for about 50 – 60 minutes, or until double in volume.
5. Remove the dough from the bowl and give a few light kneading to punch out the gas in the dough. Turn out the dough and fold the dough into thirds.
6. Divide the dough into 8 equal portions and shape into rounds. Cover with a damp cloth or cling wrap and let them rest for 10 minutes.
7. Roll out each portion of dough into a 10-cm (4-inch) oval. Place a portion of sweetened red beans in the centre of the dough and fold the dough in half. Make 4 incisions 2-cm with a bread scraper.
8. Place the dough on a lined baking tray, cover with cling wrap and let them proof for about 40 – 50 minutes, or until double in volume.
9. Brush the top with egg wash.
10. Bake in a preheated oven at 200°C for 10 minutes, or until golden brown.
Matcha Red Bean Buns
Ingredients (Makes 8)
200 g bread flour
4 g instant yeast
20 g sugar
3 g (½ tsp) salt
20 g egg
100 g warm water
20 g unsalted butter
2 g (1 tsp) matcha powder
1 can of sweetened red beans
Some beaten egg, for egg wash
Method
1. Sprinkle the yeast over the warm water. Stir to dissolve the yeast. Leave for 15 minutes.
2. Combine all ingredients except butter in a bowl and knead till a non-sticky dough is formed.
3. Add in butter and continue to knead till the dough is smooth, elastic and non-sticky. Do the window pane test.
4. Place the dough in a lightly greased mixing bowl, cover with cling wrap and let it proof for about 50 – 60 minutes, or until double in volume.
5. Remove the dough from the bowl and give a few light kneading to punch out the gas in the dough. Turn out the dough and fold the dough into thirds.
6. Divide the dough into 8 equal portions and shape into rounds. Cover with a damp cloth or cling wrap and let them rest for 10 minutes.
7. Roll out each portion of dough into a 10-cm (4-inch) oval. Place a portion of sweetened red beans in the centre of the dough and fold the dough in half. Make 4 incisions 2-cm with a bread scraper.
8. Place the dough on a lined baking tray, cover with cling wrap and let them proof for about 40 – 50 minutes, or until double in volume.
9. Brush the top with egg wash.
10. Bake in a preheated oven at 200°C for 10 minutes, or until golden brown.
Labels:
Breads and Loaves
Tuesday, October 22, 2013
Red Bean Buns
I am in the bread-making mode these days. This bun is made using the direct (straight) bread dough mixing method.
Red Bean Buns
Ingredients (Makes 8)
200 g bread flour
20 g sugar
3 g (½ tsp) salt
4 g instant yeast
100 g warm water
20 g egg
20 g unsalted butter
240 g red bean filling
Some black sesame seeds, for topping
Method
1. Sprinkle the yeast over the warm water. Stir to dissolve the yeast. Leave for 15 minutes.
2. Combine all ingredients except butter in a bowl and knead till a non-sticky dough is formed.
3. Add in butter and continue to knead till the dough is smooth, elastic and non-sticky. Do the window pane test.
4. Place the dough in a lightly greased mixing bowl, cover with cling wrap and let it proof for about 50 – 60 minutes, or until double in volume.
5. Remove the dough from the bowl and give a few light kneading to punch out the gas in the dough. Turn out the dough and fold the dough into thirds.
6. Divide the dough into 8 equal portions and shape into rounds. Cover with a damp cloth or cling wrap and let them rest for 10 minutes.
7. Roll out each portion of dough into a circle. Place a portion of red bean filling (30 g) in the centre of the dough. Seal the bun tightly and shape into rounds.
8. Place the dough on a lined baking tray, cover with cling wrap and let them proof for about 40 – 50 minutes, or until double in volume.
9. Brush the top with egg wash and sprinkle with the black sesame seeds with a rolling pin.
10. Bake in a preheated oven at 200°C for 10 minutes, or until golden brown.
Red Bean Buns
Ingredients (Makes 8)
200 g bread flour
20 g sugar
3 g (½ tsp) salt
4 g instant yeast
100 g warm water
20 g egg
20 g unsalted butter
240 g red bean filling
Some black sesame seeds, for topping
Method
1. Sprinkle the yeast over the warm water. Stir to dissolve the yeast. Leave for 15 minutes.
2. Combine all ingredients except butter in a bowl and knead till a non-sticky dough is formed.
3. Add in butter and continue to knead till the dough is smooth, elastic and non-sticky. Do the window pane test.
4. Place the dough in a lightly greased mixing bowl, cover with cling wrap and let it proof for about 50 – 60 minutes, or until double in volume.
5. Remove the dough from the bowl and give a few light kneading to punch out the gas in the dough. Turn out the dough and fold the dough into thirds.
6. Divide the dough into 8 equal portions and shape into rounds. Cover with a damp cloth or cling wrap and let them rest for 10 minutes.
7. Roll out each portion of dough into a circle. Place a portion of red bean filling (30 g) in the centre of the dough. Seal the bun tightly and shape into rounds.
8. Place the dough on a lined baking tray, cover with cling wrap and let them proof for about 40 – 50 minutes, or until double in volume.
9. Brush the top with egg wash and sprinkle with the black sesame seeds with a rolling pin.
10. Bake in a preheated oven at 200°C for 10 minutes, or until golden brown.
Labels:
Breads and Loaves
Monday, October 21, 2013
Matcha Mushipan
Mushipan are Japanese steamed cup breads. The texture is more like our Chinese steamed cake. A simple and healthy recipe to share with all of you! :)
Matcha Mushipan
Ingredients (Makes 5)
100 g rice flour / cake flour
1 tsp baking powder
1 tsp matcha powder
1 egg
50 g castor sugar
80 cc milk
1 tbsp vegetable oil
Method
1. Sift rice flour, matcha powder and baking powder together. Set aside.
2. In a mixing bowl, whisk egg and sugar together. Add in milk and oil and mix well.
3. Add in flour mixture and mix well.
4. Pour the batter into the moulds.
5. Steam over medium heat for about 10 minutes.
Matcha Mushipan
Ingredients (Makes 5)
100 g rice flour / cake flour
1 tsp baking powder
1 tsp matcha powder
1 egg
50 g castor sugar
80 cc milk
1 tbsp vegetable oil
Method
1. Sift rice flour, matcha powder and baking powder together. Set aside.
2. In a mixing bowl, whisk egg and sugar together. Add in milk and oil and mix well.
3. Add in flour mixture and mix well.
4. Pour the batter into the moulds.
5. Steam over medium heat for about 10 minutes.
Saturday, May 11, 2013
Join me at Facebook
Hi blogger friends and fans,
I am a total beginner when it comes to Facebook and I have just started a page Rochelle & Crafts for my love for crafts and updates on the workshops that I am conducting. I will appreciate if you can take a few minutes of your time to visit, share and LIKE it. Who knows, you might find one craft that you might be interested and re-discover your hidden talents. :)
Labels:
Crafts
Wednesday, April 3, 2013
Chicken and Mushroom Spaghetti
I know pasta is not new to most of you, be it cooking at home or dining outside. Believe it or not, the number of times that I have eaten pasta can be counted with two hands.
Well, that is due to my bad experience with the pasta that used to sell at my campus canteen. My recollection is, the spaghetti tasted really horrible then and after taking a mouthful or two, I got so sick of it that I couldn't finish the dish. That probably explained why the queue for that stall was the shortest and since I was rushing for classes, I had no other choice then.
Anyway after that incident, I steered away from pasta for years. Whenever I go to Italian restaurants that serve mainly pizza and pasta, without a second thought I will always go for the pizza, despite being desperately hungry and knowing that pizza generally takes a longer time to serve. Hmm, that pretty much summarises how much I really dislike pasta.
All these changes after one holiday trip to Melbourne 2 years ago, where I got to eat delicious pasta prepared by Italian chefs for the first time. It was so yummy that I finish the dish within minutes! :D
I have some time today to make myself a simple lunch: A light and delicious chicken and mushroom spaghetti! :)
At least now I know how to differentiate the good from the bad. For those of you who don't like pasta or have not tried cooking pasta at home, this is a simple dish that you must try and I am sure that you will not be disappointed. :)
Chicken and Mushroom Spaghetti
Adapted from: Noob Cook
Ingredients
2 servings of tubular spaghetti / pasta of your choice (about 140 - 160 g)
100 g white button mushrooms, sliced thinly
100 g chicken fillet, cubed / sliced
10 cloves garlic, peeled and sliced thinly
4 tbsp olive oil, divided
20 g butter, cubed
Dried chilli flakes
Shredded parsley
Grated parmesan cheese
Salt
Coarse black pepper
Method
1. Bring a pot of water with some salt to a boil. Cook the tubular spaghetti according to the timing indicated on the packet, until al dente. Drain and set aside the pasta, reserving a small cup of the pasta water.
2. Heat saucepan with 1 tbsp of olive oil. Add mushrooms and chicken, a pinch of salt and black pepper. Stir fry or sauté until cooked. Set aside cooked mushrooms and chicken on a plate.
3. Heat 3 tbsp olive oil in the same pan; add garlic and chilli flakes. Sauté the garlic until it starts to turn light golden brown.
4. Turn off the stove. The garlic will continue cooking in the hot oil on its own for a few more seconds in the hot oil, until they turn a lovely golden brown. Melt the butter in the garlic and oil mixture.
5. Add cooked pasta, cooked mushrooms and chicken mixture, some salt and black pepper. Toss to coat all the ingredients evenly, adding some reserved pasta water to help the ingredients bind together.
6. Serve with Parmesan cheese and shredded parsley.
Labels:
Pasta and Rice
Monday, March 18, 2013
Earl Grey Tea Cupcakes
My first greetings in 2013!
Earl Grey tea is my favourite tea and I love these tea-scented cupcakes to every bit. After staying away from the kitchen for so long, I do not know that I will miss baking so much! To me, baking is a little time for myself to indulge in a fun and therapeutic activity. This little cupcake makes me itch for another baking time soon! :)
I love the look of the generous specks of Earl Grey tea powder in the cupcake. If I were to make this again, I will add in some lemon zest to enhance the flavour. :)
Earl Grey Tea Cupcakes
Adapted from: 好想为你亲手做出美味的甜点! by 检见崎聡美
Ingredients (Makes 8 cupcakes of 100 cc)
100 g cake flour
2 tbsp (4 satchels) Earl Grey tea leaves / tea powder
100 g butter, softened at room temperature
80 g granulated sugar
3 eggs, separated
1 tbsp rum
Some lemon essence
Method
1. Line the paper cases in the cupcake tin.
2. Place the cake flour and ground tea leaves (or tea powder) in a bowl and mix using a hand whisk, loosening / breaking up all the lumps in the flour.
3. Whisk the butter till smooth and glossy and resembles mayonnaise. Add 70 g sugar in 3 additions and whisk till sugar is dissolved and the batter is pale and increase in volume.
4. Add egg yolk one at a time, whisking well in each addition. Continue whisking until the batter is thick, creamy and lemon in colour.
5. Add in rum and essence and give it a quick mix.
6. In a mixing bowl, beat egg whites till foamy. Add 10 g sugar and beat till stiff peaks form.
7. Add ⅓ of the beaten egg whites to the egg yolk batter and mix using a hand whisk swiftly without deflating.
8. Sift in the ⅓ of the flour mixture and mix using a hand whisk.
9. Add in the rest of the beaten egg whites and fold using a spatula swiftly without deflating.
10. Sift in the rest of the flour mixture and fold using a spatula.
11. Spoon the batter into the cases until 90% full. Bake in a preheated oven at 170°C – 180°C for 50 minutes.
12. Remove and cool in tin, then unmold and cool completely.
Notes
- I replaced rum and lemon essence with 1 tsp vanilla essence.
- I sifted Earl Grey tea powder together with the flour.
Earl Grey tea is my favourite tea and I love these tea-scented cupcakes to every bit. After staying away from the kitchen for so long, I do not know that I will miss baking so much! To me, baking is a little time for myself to indulge in a fun and therapeutic activity. This little cupcake makes me itch for another baking time soon! :)
I love the look of the generous specks of Earl Grey tea powder in the cupcake. If I were to make this again, I will add in some lemon zest to enhance the flavour. :)
Earl Grey Tea Cupcakes
Adapted from: 好想为你亲手做出美味的甜点! by 检见崎聡美
Ingredients (Makes 8 cupcakes of 100 cc)
100 g cake flour
2 tbsp (4 satchels) Earl Grey tea leaves / tea powder
100 g butter, softened at room temperature
80 g granulated sugar
3 eggs, separated
1 tbsp rum
Some lemon essence
Method
1. Line the paper cases in the cupcake tin.
2. Place the cake flour and ground tea leaves (or tea powder) in a bowl and mix using a hand whisk, loosening / breaking up all the lumps in the flour.
3. Whisk the butter till smooth and glossy and resembles mayonnaise. Add 70 g sugar in 3 additions and whisk till sugar is dissolved and the batter is pale and increase in volume.
4. Add egg yolk one at a time, whisking well in each addition. Continue whisking until the batter is thick, creamy and lemon in colour.
5. Add in rum and essence and give it a quick mix.
6. In a mixing bowl, beat egg whites till foamy. Add 10 g sugar and beat till stiff peaks form.
7. Add ⅓ of the beaten egg whites to the egg yolk batter and mix using a hand whisk swiftly without deflating.
8. Sift in the ⅓ of the flour mixture and mix using a hand whisk.
9. Add in the rest of the beaten egg whites and fold using a spatula swiftly without deflating.
10. Sift in the rest of the flour mixture and fold using a spatula.
11. Spoon the batter into the cases until 90% full. Bake in a preheated oven at 170°C – 180°C for 50 minutes.
12. Remove and cool in tin, then unmold and cool completely.
Notes
- I replaced rum and lemon essence with 1 tsp vanilla essence.
- I sifted Earl Grey tea powder together with the flour.
Sunday, December 23, 2012
Merry Christmas!
This will be my last post for this year. Sending my early greetings to all my
dear readers. Wishing all of you a joyous Christmas and a Happy New Year!!! :)
Labels:
Dates and Events
Wednesday, May 23, 2012
Wednesday, May 16, 2012
Coconut Buns
Coconut Buns
Adapted from: Do What I Like
Ingredients (Makes 9)
Bread Dough
240 g bread flour
30 g cake flour
4 g instant yeast
40 g sugar
1/8 tsp salt
1 egg + milk / water to measure up to 170 g
30 g unsalted butter
Coconut Filling
130 g freshly grated coconut
70 g gula melaka, chopped into small pieces
2 tbsp hot water
Pinch of salt
Method
Coconut Filling:
1. Put hot water and gula melaka into a saucepan over medium heat and cook till gula melaka dissolves.
2. Add in the freshly grated coconut and salt and cook till the mixture is a little dry. The filling should not be too wet but just moist enough.
3. Remove from heat and set aside to cool.
Bread Dough:
4. Combine all ingredients except butter in a bowl and knead till a non-sticky dough is formed.
5. Add in butter and continue to knead till the dough is smooth, elastic and non-sticky.
6. Place the dough in a lightly greased mixing bowl, cover with cling wrap and let it proof for about 60 minutes, or until double in volume.
Assembling:
7. Remove the dough from the bowl and give a few light kneading to punch out the gas in the dough.
8. Divide the dough into 9 equal portions, about 55 g each and shape into rounds.
9. Roll out each dough into a circle. Place a portion of coconut filling in the centre of the dough. Seal the bun tightly and shape into rounds.
10. Place the dough on a lined baking tray, cover with cling wrap and let them proof for about 45 minutes.
11. Bake in a preheated oven at 190°C for 15 – 20 minutes.
Notes
- I divided the dough to 10 portions, about 50 g each.
Labels:
Breads and Loaves
Tuesday, May 8, 2012
Sourdough Pretzels
It is very easy to make these pretzels. The recipe calls for sourdough starter straight from the refrigerator, hence there is no need to feed it first. :)
These pretzels are really soft and chewy when fresh from the oven. Sourdough pretzels, anyone? :)
Sourdough Pretzels
Adapted from: King Arthur Flour
Ingredients (Makes 12)
Pretzel Dough
3/4 cup lukewarm water
1 cup sourdough starter, unfed and straight from the refrigerator
3 cups plain flour
1/4 cup milk powder
1 tbsp sugar
1 tbsp butter or vegetable oil
1 1/2 tsp salt
2 tsp instant yeast
Topping
1 tbsp sugar
2 tbsp lukewarm water
Some pretzel salt, for sprinkling
2 tbsp melted butter, for brushing (Optional)
Method
1. Mix and knead the dough ingredients — by hand, mixer, or bread machine — to make a cohesive, fairly smooth dough. It should be slightly sticky; if it seems dry, knead in an additional tablespoon or two of water.
2. Cover the dough and let it rest for 45 minutes. It will rise minimally. Towards the end of the rising time, preheat the oven to 350°F.
3. Turn the dough out onto a lightly greased work surface, fold it over a few times to gently deflate it, then divide it into 12 pieces, each weighing about 2 ¼ to 2 ½ ounces.
4. Roll each piece of dough into an 18-inch rope. Shape each rope into a pretzel.
5. Prepare the topping solution: Dissolve the sugar in the water. Brush the pretzels with the solution, and sprinkle lightly with coarse pretzel salt.
6. Bake the pretzels for 25 to 30 minutes, until they're a light golden brown.
7. Remove the pretzels from the oven, and brush with melted butter, if desired.
Notes
- Cover the dough with plastic wrap as you work with the individual pieces to keep it from drying out.
- There's no need to let the shaped pretzels rise before baking.
- I made half of the recipe and omitted pretzel salt.
These pretzels are really soft and chewy when fresh from the oven. Sourdough pretzels, anyone? :)
Sourdough Pretzels
Adapted from: King Arthur Flour
Ingredients (Makes 12)
Pretzel Dough
3/4 cup lukewarm water
1 cup sourdough starter, unfed and straight from the refrigerator
3 cups plain flour
1/4 cup milk powder
1 tbsp sugar
1 tbsp butter or vegetable oil
1 1/2 tsp salt
2 tsp instant yeast
Topping
1 tbsp sugar
2 tbsp lukewarm water
Some pretzel salt, for sprinkling
2 tbsp melted butter, for brushing (Optional)
Method
1. Mix and knead the dough ingredients — by hand, mixer, or bread machine — to make a cohesive, fairly smooth dough. It should be slightly sticky; if it seems dry, knead in an additional tablespoon or two of water.
2. Cover the dough and let it rest for 45 minutes. It will rise minimally. Towards the end of the rising time, preheat the oven to 350°F.
3. Turn the dough out onto a lightly greased work surface, fold it over a few times to gently deflate it, then divide it into 12 pieces, each weighing about 2 ¼ to 2 ½ ounces.
4. Roll each piece of dough into an 18-inch rope. Shape each rope into a pretzel.
5. Prepare the topping solution: Dissolve the sugar in the water. Brush the pretzels with the solution, and sprinkle lightly with coarse pretzel salt.
6. Bake the pretzels for 25 to 30 minutes, until they're a light golden brown.
7. Remove the pretzels from the oven, and brush with melted butter, if desired.
Notes
- Cover the dough with plastic wrap as you work with the individual pieces to keep it from drying out.
- There's no need to let the shaped pretzels rise before baking.
- I made half of the recipe and omitted pretzel salt.
Labels:
Breads and Loaves
Monday, May 7, 2012
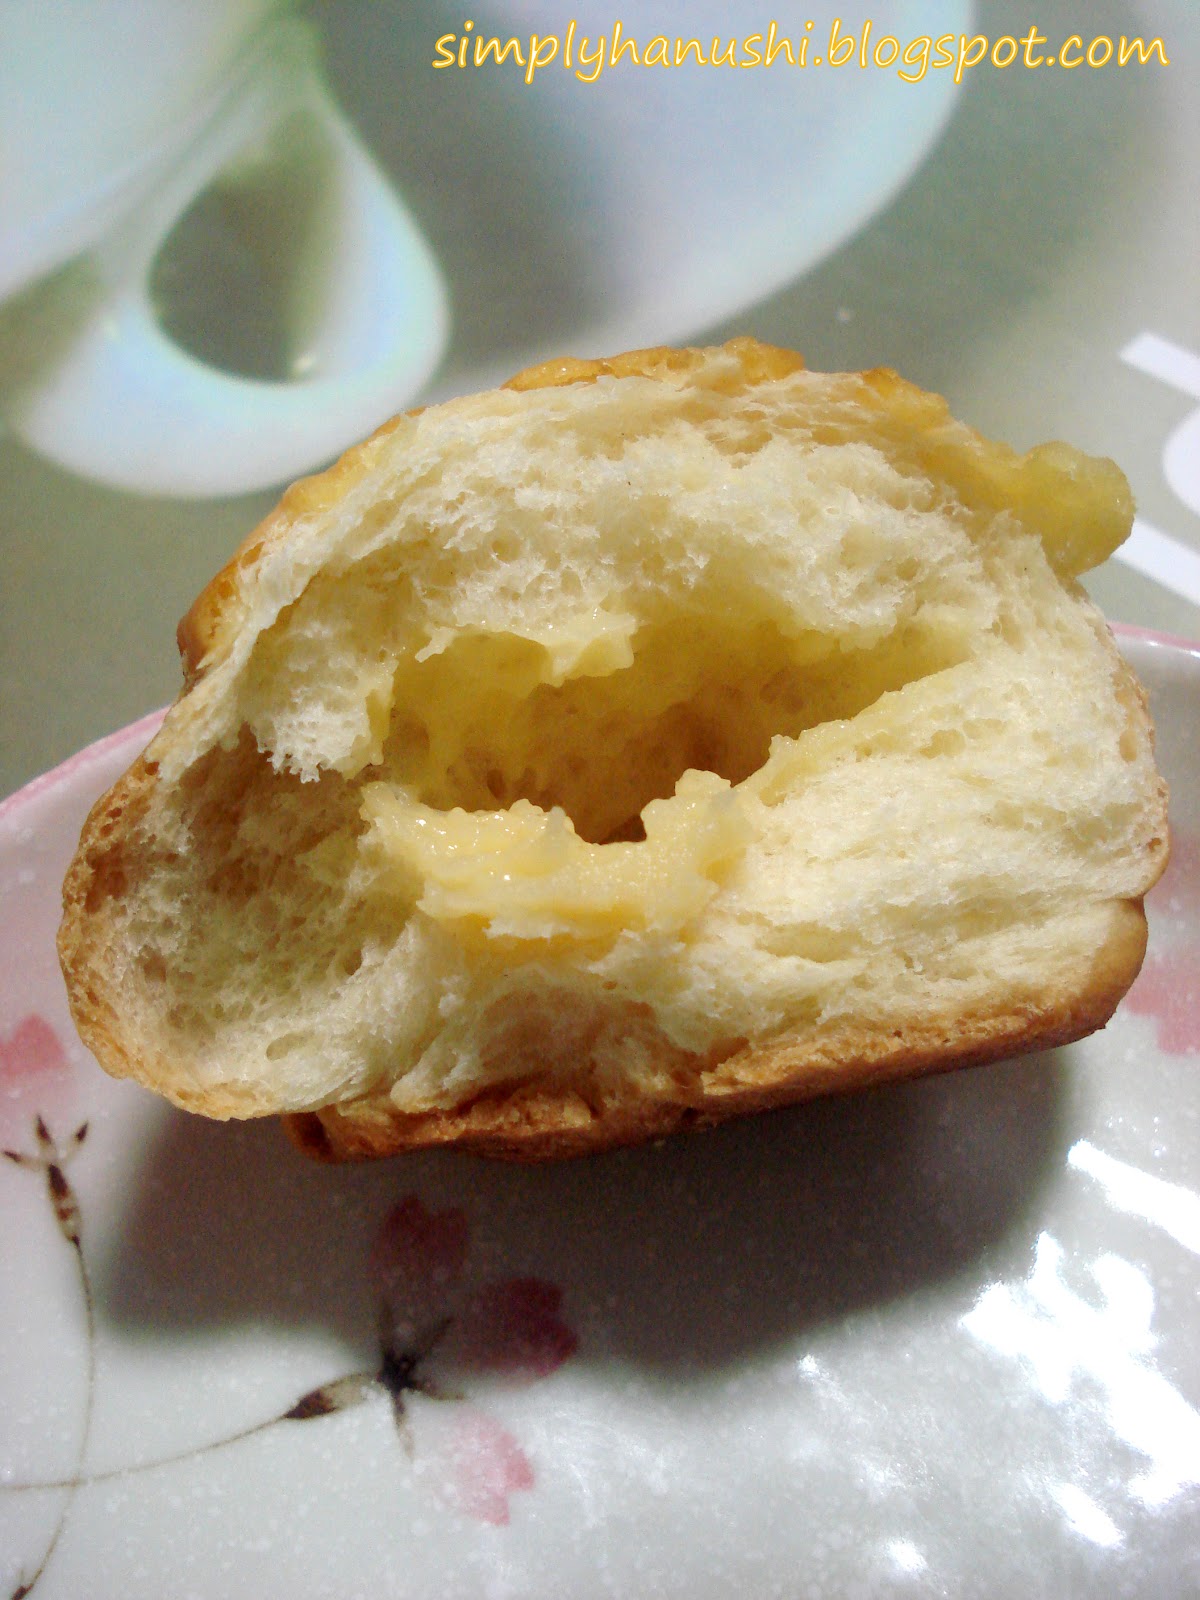
Custard Buns
I had a hard time trying to wrap the custard filling into the bread dough. Only a couple of the buns turned out to be presentable, without the custard filling seeping out while baking. Haha...
This bun was for my breadfast on the following day. With some light toasting, the inside of the bun remains soft. Pardon the stingy amount of custard filling. If not, I might not be able to wrap this bun. Haha...
Labels:
Breads and Loaves
Sunday, May 6, 2012
Friday, April 13, 2012
Matcha Financiers
Matcha Financiers
Adapted from: Happy Flour
Ingredients (Makes 10)
50 g unsalted butter, melted
65 g egg whites
35 g caster sugar
25 g cake flour
25 g ground almond
1/2 tsp corn flour
1 tsp matcha powder
Pinch of baking powder
Pinch of salt
Method
1. Melt butter over low fire until slightly brown and gives off a nutty aroma. Set aside to cool and strain.
2. Sift cake flour, ground almonds, corn flour, matcha powder, baking powder and salt together and set aside.
3. In a clean big bowl, whisk egg whites until foamy.
4. Add in sugar and continue to whisk till sugar is dissolved.
5. Fold in flour mixture until well-blended.
6. Fold in melted butter until well-blended.
7. Spoon the batter into greased moulds till 90% full.
8. Bake in a preheated oven at 190°C for 10 – 15 minutes or till lightly browned.
9. Remove the financiers from the moulds and cool on a wire rack.
Notes
- I did not strain the butter after melting.
Thursday, April 12, 2012
Rustic Sourdough Bread
Adapted from: King Arthur Flour
Ingredients (Makes 2 loaves)
1 cup "fed" sourdough starter
1 1/2 cups lukewarm water
2 tsp instant yeast
1 tbsp sugar
2 1/2 tsp salt
5 cups plain flour
Method
1. Combine all of the ingredients, kneading to form a smooth dough.
2. Allow the dough to rise, in a covered bowl, until it's doubled in size, about 90 minutes.
3. Gently divide the dough in half; it'll deflate somewhat.
4. Gently shape the dough into two oval loaves; or, for longer loaves, two 10" to 11" logs. Place the loaves on a lightly greased or parchment-lined baking sheet. Cover and let rise until very puffy, about 1 hour. Towards the end of the rising time, preheat the oven to 425°F.
5. Spray the loaves with lukewarm water.
6. Make two fairly deep diagonal slashes in each; a serrated bread knife, wielded firmly, works well here.
7. Bake the bread for 25 to 30 minutes, until it's a very deep golden brown. Remove it from the oven, and cool on a rack.
Notes
- I made half of the recipe.
Labels:
Breads and Loaves
Tuesday, April 3, 2012
Awards (Liebster Blog, The Versatile Blogger)
This is a long over-due post.
Thank you to Cathy of Cathy's Joy and Honey Boy of Cosy Bake for passing this Liebster Blog Award to me. It is really sweet of them to remember me, even though I haven't been active on blogosphere. :)
And thank you to Eileen of Hundred Eighty Degrees for passing "The Versatile Blogger" award to me. :)
Thank you to Cathy of Cathy's Joy and Honey Boy of Cosy Bake for passing this Liebster Blog Award to me. It is really sweet of them to remember me, even though I haven't been active on blogosphere. :)
And thank you to Eileen of Hundred Eighty Degrees for passing "The Versatile Blogger" award to me. :)
Labels:
Awards
Thursday, March 29, 2012
Natural Yeast Bread Loaf
With courtesy of Cathy, I am now a proud 'owner' of natural yeast too. It is really so fun to see the yeast bubbling, full with liveliness. :)
With this, I made this wonderful bread loaf. I have no problem when handling the dough as the dough is really soft and reaches the membrane stage easily. :)
Natural Yeast Bread Loaf
Adapted from: Cathy's Joy
Ingredients (Makes a loaf)
200 g natural yeast
230 g bread flour
20 g plain flour
20 g sugar
1/4 tsp salt
90 ml milk
30 g butter
Method
1. Combine all ingredients except butter, in a mixer and beat until a non-sticky dough is formed.
2. Add in butter and continue to beat until the dough is smooth, elastic and non-sticky. Do the window pane test.
3. Place the dough in a lightly greased mixing bowl, cover with cling wrap and let it proof for about 1.5 hrs, or until double in volume.
4. Remove the dough from the bowl and give a few light kneading to punch out the gas in the dough.
5. Shape into round, cover with a damp cloth or cling wrap and let it rest for 20 minutes.
6. Roll out the dough into a long rectangle, with the shorter end to be the same length as the length of the loaf pan. Roll up the dough from the shorter end in a swiss-roll style. Pinch and seal the seam.
7. Place the dough in a lightly greased loaf pan and let it proof for the second time for about 1.5 hrs, or until double in volume.
8. Bake in a preheated oven at 190°C for 45 minutes.
9. Remove from the oven, unmold immediately and let it cool completely before slicing.
Notes
- I divided the dough into 2 portions after the first proof.
- I sprinkled some water and Nestum cereals on top of the dough before popping it into the oven to bake.
With this, I made this wonderful bread loaf. I have no problem when handling the dough as the dough is really soft and reaches the membrane stage easily. :)
Natural Yeast Bread Loaf
Adapted from: Cathy's Joy
Ingredients (Makes a loaf)
200 g natural yeast
230 g bread flour
20 g plain flour
20 g sugar
1/4 tsp salt
90 ml milk
30 g butter
Method
1. Combine all ingredients except butter, in a mixer and beat until a non-sticky dough is formed.
2. Add in butter and continue to beat until the dough is smooth, elastic and non-sticky. Do the window pane test.
3. Place the dough in a lightly greased mixing bowl, cover with cling wrap and let it proof for about 1.5 hrs, or until double in volume.
4. Remove the dough from the bowl and give a few light kneading to punch out the gas in the dough.
5. Shape into round, cover with a damp cloth or cling wrap and let it rest for 20 minutes.
6. Roll out the dough into a long rectangle, with the shorter end to be the same length as the length of the loaf pan. Roll up the dough from the shorter end in a swiss-roll style. Pinch and seal the seam.
7. Place the dough in a lightly greased loaf pan and let it proof for the second time for about 1.5 hrs, or until double in volume.
8. Bake in a preheated oven at 190°C for 45 minutes.
9. Remove from the oven, unmold immediately and let it cool completely before slicing.
Notes
- I divided the dough into 2 portions after the first proof.
- I sprinkled some water and Nestum cereals on top of the dough before popping it into the oven to bake.
Labels:
Breads and Loaves
Monday, March 26, 2012
Baking Together
I had a great time with Cathy last last Friday. I guess most of you would have already seen the photos of our bakes. :)
Matcha Swiss Roll with Red Beans
I finally get to join the swiss roll craze made popular by Junko's 彩繪蛋糕卷, thanks to the guidance from Cathy. Look at the beautiful swiss roll that we have made. Trust me, it not only looks pretty, it tastes fabulous too! You have my word on it. :)
Steamed Dual-Coloured Buns
Mantous (Chinese steamed buns) are normally shaped in round spiral. Due to my inconsistencies, these mantous have been transformed to triangular instead, which remind me of onigiri (a Japanese rice ball which are normally formed into triangular shapes). Soft and fluffy, they go well with a cupof green tea too! A new food fusion perhaps? :)
Please refer to Cathy's Joy for the recipes of the Matcha Swiss Roll with Red Beans and Steamed Dual-Coloured Buns. :)
Matcha Swiss Roll with Red Beans
I finally get to join the swiss roll craze made popular by Junko's 彩繪蛋糕卷, thanks to the guidance from Cathy. Look at the beautiful swiss roll that we have made. Trust me, it not only looks pretty, it tastes fabulous too! You have my word on it. :)
Steamed Dual-Coloured Buns
Mantous (Chinese steamed buns) are normally shaped in round spiral. Due to my inconsistencies, these mantous have been transformed to triangular instead, which remind me of onigiri (a Japanese rice ball which are normally formed into triangular shapes). Soft and fluffy, they go well with a cupof green tea too! A new food fusion perhaps? :)
Please refer to Cathy's Joy for the recipes of the Matcha Swiss Roll with Red Beans and Steamed Dual-Coloured Buns. :)
Subscribe to:
Posts (Atom)